In the original IBM PC and PC/XT the BIOS ROM was an 8K byte Read Only Memory, located at the end of the addressable memory space. The 8088 processor had 20 address lines and so could address one Meg of Memory.
The BIOS ROM started at FE000hex and extended to FFFFFhex.
In addition to the POST and its associated setup and bootstrap routines, the BIOS ROM also contains a series of Basic Input Output Services that provide services to DOS and to application software.
The BIOS ROM in the PC/AT computer, and in all modern Intel based computers, is a 64K byte ROM and occupies all the "F" region of memory, starting at F0000hex and extending to FFFFFhex. This is at the end of the first One Meg of address space.
The original IBM computers, PC, PC/XT and PC/AT all had 32K byte Basic Interpreter ROM in the "F" region, extending from F6000hex to FDFFFhex. This area of the BIOS ROM is used by other PC Computer manufacturers to provide the CMOS setup routines and other advanced features in modern PC Computer systems.
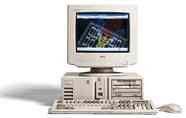
Signs of the POST Routines at work
The POST routines configure the system and carry out tests on all parts of the system. The most visible of these tests is the memory test where you see some indication of it occurring on the Video Display Screen. A series of read/write tests designed to find faulty RAM memory locations is carried out and when a memory location fails these tests, the test routine reports the problem. The RAM test is carried out to various degrees of complexity, some older systems only tested the beginning of every 64K block of memory. Modern PC type computers test every byte of memory.
Testing RAM is only one of the start up routines in the BIOS ROMs many start up responsibilities. The POST runs reliability tests on your RAM, BIOS ROM, Processor and special I/O chips. It then goes on to run CONFIGURATION routines that configure the various support chips that work with the microprocessor, determines what optional equipment is attached, gives adapters the chance to initialize themselves, sets up the Interrupt Vector Table in low memory, gets the keyboard ready to send keystrokes to the CPU, and invokes the BOOTSTRAP LOADER, which in turn loads the Operating System. After this final step, you see the first evidence that the Operating System is up and running, the command-line prompt under DOS, or the GUI under Windows.
To better understand these process, we will trace the start up sequence followed by the original IBM PC and PC/XT, then we will highlight the differences between its POST and the POST for all later generation computers including Pentium based systems. The complexity of the start up process has grown as hardware has evolved, but the same theme and general order of operations has been carried through from the very first PC, to the most recent Intel processor based computer.
Phase one, basic hardware test and configure
The very first CPU related event that takes place when power is applied to the microprocessor is execution of the instruction at address FFFF0hex (FFFF:0000hex in Segment and Offset format). In the original IBM PC, this instruction is a far jump to the beginning of the POST routine stored in the BIOS ROM. The processor is configured internally to get its first instruction from locations FFFF0 to FFFF4hex - This is the COLD RESET VECTOR. The first byte is a JUMP instruction (EA) and the next four bytes are required to define a 20 bit address in Segment and Offset format .This address is usually FE05Bhex and is the actual start of the POST code in the BIOS ROM.
If you use debug to Un assemble the last five bytes of the BIOS ROM you will see the actual Jump instruction and the address it refers to. The address can be defined in Segment and Offset format as F000:E05Bhex.
The actual bytes as displayed by the Dump command in Debug are, EA, 5B, E0, 00, and F0. EA is the Jump Instruction. The following pairs of bytes must be transposed to arrive at the actual address. 5B E0 is E05Bhex and 00 F0 is F000hex. This converts to an absolute address of FE05Bhex.
The POST routine begins by exercising the CPU and trapping any errors or inconsistent handling of instructions. After verifying that the BIOS ROM itself is intact, which it does by employing a Check Sum procedure, the POST sets up the 8253 device.
The 8253 is a timer chip and provides three multipurpose counter/timers for accurate timing of events under software control. Timer 0 is wired into the CPU through the 8259A programmable interrupt controller to generate timer interrupts at a frequency of roughly 18.2 times per second. In the PC/XT only, Timer 1 is used to trigger dummy DMA (Direct Memory Access) transfer requests for periodic RAM refresh. The computers RAM Memory uses DYNAMIC RAM chips and these must be refreshed regularly.
Timer 2 is available for tone generation in the built in speaker and for other multipurpose timing applications under user control. Timer zero is initialized and submitted it to a crude frequency check, and configured to produce a pulse (interpreted as an interrupt by the 8259A) every 65,536 th clock cycle. The 8259A is a hardware interrupt controller chip that processes hardware interrupts generated by devices and brings then to the attention of the processor.
A DMA controller chip, an 8237, is also on the System Board. Direct Memory Access is a mechanism for transferring data directly between memory locations without involving the CPU. On the PC, three of the 8237's four 20-bit DMA channels are used primarily to free the microprocessor from relatively slow disk I/O, the fourth is dedicated to memory refresh in the original PC and PC/XT only. Immediately after initializing the 8253, the POST subjects the registers of the 8237 chip to a write/read test and, if no problems are detected, begins the periodic memory refresh (PCand PC/XT only).
With dynamic RAM now up and available the POST reads the System Board DIP switches to determine how much memory is installed on the System Board and expansion cards. Remember, the "old" XT type computer used DIP switches rather than a CMOS RAM to hold the configuration. The first 16K of RAM is subjected to a full integrity test, while any remaining RAM is simply initialized to zero. Then the 8259A chip is set up to arbitrate interrupts arriving on its eight request lines, and the first 32 interrupt vectors are directed to a temporary Interrupt Service Routine. The 8259A handles interrupts in the computer by prioritizing requests from external sources and passing them on, one at a time, to the CPU.
After the 8259A is initialized, the POST tests it by masking off hardware interrupts and entering a do-nothing delay loop of approximately 1 second in duration. If no interrupts occur during that time, then the POST continues, otherwise execution is abruptly stopped. Finally, to round out the first phase of operation, the proper values of Interrupt Vectors 10hex through 1Fhex to their respective places in low memory. Interrupt Vectors are used to point to the start of routines that service interrupt requests.
Testing the Video Interface
With the most basic pieces of hardware now working, attention is turned to the Video Interface. The configuration DIP switch is read, (remember we are still talking about the original IBM PC and PC/XT) and the result is stored in the low byte of the BIOS data areas equipment flag word. The default Video Mode is determined from switches 4 and 5 and function 0 of interrupt 10hex is called to initialize the 6845 Video Controller Chip, set up the video parameters in the BIOS data area, clear the video buffer, and position the cursor in the upper-left corner of the screen. The 6845 chip is the programmable CRT controller used in IBM's original CGA and MDA display adapters. For compatibility, the 6845 is partially emulated in EGA and VGA Video Interfaces. As a result, you can insert a VGA Video Interface Card into a slot in an old original IBM PC and the POST will still work correctly, even though it pre-dated the video technology by several years.
Next, the Video RAM (located on the Video Interface card), is subjected to a thorough write/read/verify test, and a single row of characters is written to the video buffer. To make sure the hardware is functioning properly, the POST delays long enough to verify that the Vertical and Horizontal retrace bits in the CRT status register periodically change polarity. (it is making sure video scanning is taking place).
After clearing the screen, a sweep of ROM address space between address C0000hex and C8000hex in 2 K increments is made, looking for a BIOS Extension ROM, mounted on the Video Interface Card. If a BIOS Extension ROM is found, control is transferred to the code in the BIOS Extension ROM located on that card, so it can initialize the Video Interface it supports. Today all Intel based computers use a VGA (or better) video card and so there is always a Video BIOS Extension ROM on the Video Interface card. We will look at Bios Extension ROMs in more detail soon.
The rest of the RAM is tested, and the Keyboard and it's Interface setup
Next comes the incremental check of all the RAM memory. The RAM memory is written to, and read from, with all ones, all zeroes, and alternating checkerboard patterns, to check for sympathetic, stuck, and unresponsive bits.
Up to this point, the POST's response to a test failure has been to shut down the system with no explanatory remarks or messages to the user. The only way the POST can communicate with the user is to send BEEP codes via the systems built in speaker. The BEEP codes issued by the various brands and versions of BIOS are not the same, so if we are to make some sense out of these, we need documentation for the BIOS fitted to the computer we are using.
As the Video System is now functioning an error messages can be displayed at this point. A Memory compare or parity check error results in an error message on the screen. In a real IBM Computer this error message was a 201 error code. Other DOS computer manufacturers may or may not use the same error codes.
With memory now verified, the keyboard is reset, tested, and checked for stuck keys. An error will produce an error message. Interrupt vectors 08 through to 0Fhex are set up.
A further search for BIOS Extension ROMs
At this point, a scan for BIOS Extension ROMs in the range of address C8000hex through F4000hex is carried out. The POST has already searched from C0000hex to C7FFFhex for a ROM on the Video Interface Card.
EGA and VGA Video Interfaces require a BIOS Extension ROM to provide support for the Video System because the native BIOS, built into even the most advanced PC Computer, only supports the original video standards, MDA and CGA. This ROM is usually 32 Kbytes in size, extending from C0000hex to C7FFFhex.
BIOS Extension ROMs are identified by having the bytes 55hex and AAhex in the first two locations in the ROM (at the first two addresses in the ROM). BIOS Extension ROMs provide support for devices that are not supported by the computers "Native" built-in BIOS.If any BIOS Extension ROMs are found, control is transferred to code inside them so they can perform their own specialised hardware initializing procedures, adding support to the built in BIOS, for the device they interface. In modern PC computer hardware, BIOS Extension ROM's may be found on Network Interface cards if the computer is a work station without a boot disk, or on a SCSI Interface card where a SCSI device is used to boot the computer.The most common of these in the days of the PX/XT computer, was the Hard Disk Drive Interface Card. The PC/XT type computers built in BIOS did not provide support for Hard Disk Drives so the interface card had to provide the support via a BIOS Extension ROM. The starting address of this BIOS Extension ROM was C8000hex.
Some Enhanced IDE Hard Disk Drive Interface Cards, of some years ago, had a BIOS Extension ROM to support advanced features not included in the native BIOS ROM. Today the native BIOS has been enhanced to include support for Enhanced IDE and so there is no need for a BIOS Extension ROM for this function now.
Getting ready to load the Operating System and to communicate with the user
The set-up routines then follow up by enabling the Disk Interface Interrupts, resetting the Floppy Disk Drive Interface (controller), turning on the Floppy Drive motor, delaying for one second, performing a seek, and shutting off the motor again. With most of the work done, the routines then perform some miscellaneous housekeeping that includes setting up the remainder of the values not already defined inside the BIOS data area. This is a 256 byte RAM workspace at absolute address 00400hex used to hold various configuration data.
Next the keyboard buffer is set-up and default time-out values for Parallel and Serial Ports are written into RAM. The next part of the process is to see how many Parallel and Serial ports are fitted, and to write their respective I/O addresses in the data areas communication address tables, in the RAM, just above the Interrupt Vector Table.
The final task before calling the Bootstrap Loader is to enable the NMI. The NMI, or nonmaskable interrupt, is a Hardware Interrupt that connects directly to the Processor and is not routed through the Interrupt Controller Chips (8259A). The NMI can't be temporally disabled with the other Hardware Interrupts. The NMI is used on the PC to report parity check errors and math co-processor exceptions.
The whole POST process usually ends by emitting one short beep from the speaker and executing a call to interrupt 19th to invoke the Boot Strap Loader routine, contained in the BIOS ROM. This Boot Strap Loader is charged with the task of starting the process of loading an Operating System from a Boot Disk.
The code loaded into RAM from the boot sector, contains another Boot Strap Loader, and it is this Loader that actually loads the Operating System into RAM. The Boot Strap Loader in the BIOS ROM is only there to load another Boot Strap Loader from the Boot Disk. This two stage boot process means the computer can be booted up into alternative Operating Systems.
Loading DOS
If the Operating System is MSDOS, this second Boot Strap Loader checks to see if the disk contains a copy of the Operating System by looking in the Data Space for the two Hidden System Files, IO.SYS and MSDOS.SYS. If these two DOS System Files are found, the Boot Strap Loader loads them into RAM, and hands over control to the routines inside them. DOS is now installed but it does not have the COMMAND.COM file (the Command Processor), loaded into memory yet. The Command Processor provides the user interface.
DOS then sets up interrupt vectors 20hex through 3Fhex and performs various other tasks required to get the Operating System working. Among other things, it is responsible for initializing resident device drivers, processing the CONFIG.SYS file, loading device drivers, and structuring DOS's layout in memory to accommodate disk buffers, internal tables, file control blocks, and device drivers. It finishes up by calling the EXEC function to load and execute COMMAND.COM, or an alternative command processor, if one was specified with the SHELL command in the CONFIG.SYS file. This facility in DOS has hardly ever been used.
The Command Processor (COMMAND.COM), processes the AUTOEXEC.BAT file, and then splits itself into a resident and a transient portion. The latter half is copied into high memory, where it can be overwritten if an application program needs the extra memory. If a program destroys the transient part, the Command Processor uses the COMSPEC variable to locate its image on disk, and reload itself, when the program ends. Its final act during startup is to display the DOS prompt in the format specified by the PROMPT environment variable and call DOS function 0Ah to read input from the Keyboard. This is the point at which you can finally type a DOS command.
Other hardware advancements required more subtle refinements to the POST. Later generation computers uses a pair of cascaded Interrupt Controllers to double the number of Hardware Interrupt Lines available. There is also two Direct Memory Access (DMA) Controllers in place of the single one found in the PC/XT. In each case, two chips must be initialized rather than one. Another key difference arises from the use of CMOS RAM to store configuration data. The CMOS RAM is validated with a check sum process similar to the one used to check the BIOS ROM, and hardware information is obtained from CMOS RAM rather than System Board DIP switches, used in the PC/XT type computer.
The most significant change made to the POST was driven by the AT computers use of the 80286 processor. The AT computer had a 24 bit Address bus and could address more than one Meg of memory. To address memory above the one Meg limit imposed by the design of the 8088 processor, the 80286 must be run in mode that gives access to this EXTENDED memory. The AT Computer switched from real mode to protected mode and back at least three times during startup. The first time, the POST determined how much of the 16 Meg Byte address space is filled with RAM. The second time, all RAM above the first 64K is tested. Each time thereafter, one or more hardware functions essential to protected-mode operation are tested. Later generation processors (80386 to Pentium) have continued this tradition on.
The bootstrapping process is more a function of the Operating System than of the hardware its running on and, in general, has remained relatively unchanged over time. With later generation machines you have the possibility that the Operating System being loaded will be Windows 95, Windows NT, Windows 98, or OS/2, rather than DOS.
The 8086 family of microprocessor chips have registers that are only 16 BITS wide, but they have Address Busses that are at least 20 Bits wide. They must use a technique called Segment and Offset addressing to generate a 20 bit address, using the 16 bit registers.
The processor chip generates a 20 bit address using two of its 16 bit registers, and combining the contents of two 16 bit registers with an offset of four bits.
An address is defined in two parts - a SEGMENT ADDRESS and an OFFSET ADDRESS
The address is written in the form SEGMENT:OFFSET (the : is a separator between the two parts)
Example - The starting address of the BIOS ROM in the old PC and PC/XT computer is FE000hex.
FE000 is a 20 bit number - 5 HEX digits, each four bits long
This same address can be written in SEGMENT and OFFSET FORMAT thus FE00:0000hex
The ABSOLUTE ADDRESS is found by adding the two number together like this :-
FE00    SEGMENT portion of the address

 0000   OFFSET  portion of the address

FE000   ABSOLUTE ADDRESS
The SEGMENT portion of the address has been moved four binary bits to the left.
Inside the processor, the Absolute Address is generated from the contents of two 16 bit registers by adding the two numbers together in the form shown above - the result is then used to address memory locations via the address bus.
BIOS Extension ROMs - DOS hardware was designed to be very flexible and it allows for the addition of hardware not even imagined when DOS was first created. One such example of this is the provision for BIOS Extension ROMs that provide support for devices the computers built in BIOS (the BIOS ROM on the System Board) does not provide support for. One good example of this feature is illustrated by one of the processes that takes place during the POST routines. You will have read about the search through memory addresses C0000 to C7FFFhex for a BIOS Extension ROM !. The built in BIOS of even the most advanced DOS computer only supports the original IBM Video Interface Standards, the Colour Graphics Adaptor and the Mono Display Adaptor.
Starting with the Enhanced Graphics Adapter in 1983, all later generation (EGA and VGA) Video Interface Cards have a BIOS Extension ROM located on the Video Card and addressed in the memory range C0000 to C7FFFhex.
The machine code in this ROM replaces the code supplied by the built in BIOS, that supports the Video System. Part of the POST routine involves searching through the memory for this ROM, located on the Video Interface Card and them allowing the code in that ROM to initialise itself thus replacing the System Boards built in video support code (provided by the System Boards built in BIOS ROM).
| Back to the opening index | Book one index |